Tag Archives: appliance repair

My Dryer Isn’t Drying My Clothes. What Can I Check?

Dryer not drying clothes

Dryer Not Drying Clothes?

If you’ve ever experienced a problem with your dryer not drying your clothes, you know how frustrating it can be. Yes, technically you could hang your clothes up outside or on your shower rod, but we know you are busy. Most days you simply don’t have time to do that! You want your dryer fixed as quickly as possible. When your appliance that is made to dry things isn’t, there are a few things you can check to determine the problem.

Air Flow

Your dryer will not dry clothes if it doesn’t have proper air flow. If a vent is clogged or partially clogged, it will increase your dry time or halt it all together.

First, check the outside vent flap or hood. Sometimes birds or small animals can make nests in the vent. Debris can also accumulate. Make sure the flap can open freely and you feel a strong slow of air coming out when the dryer is running. If you can’t feel air or there is a blockage, clean it out.

You also need to clean the lint filter. Don’t forget to clean out the lint filter each time before starting your dryer. You can also do a more heavy-duty cleaning by vacuuming out the area under the lint filter with a nozzle attachment. In your yearly maintenance of your dryer, be sure to clean the venting system thoroughly. It will help you avoid drying problems in the future.

Check the power

If your dryer isn’t drying at all and isn’t even turning on, you may have a problem with the power. A power issue may have to do with the outlet power supply, a blown fuse or even a circuit breaker. You can rule these out by checking the terminal block. If it’s not burned out there may be a problem with the door switch, thermostat, start switch or thermal fuse.

You may also have an issue with the buttons not fully depressing to make your drying selection. Hopefully this is your problem, because it’s simple to fix. The same goes with a dryer door that may seem closed, but really is slightly open preventing your dryer from starting.

Maintained Ducts

You should also check out the dryer’s duct, the metal hose found behind your dryer. Look for any visible damage like kinks or sagging. You should also check the inside for any blockages. Once it is removed, you can shake it out or run a bunched up cloth through it to remove any buildup. If this part is damaged, it needs to be replaced.

These are a few simple trouble shooting steps you can take to decide why your dryer is not drying your clothes. With many other possibilities as to why your dryer is on the fritz, call a professional to help you find the problem. If you’re looking for same day service with a one year parts and labor warranty, give the guys at Complete Appliance Repair. They are experienced with years of electrical and technical repairs, and can work with both older and newer makes and models. Ditch the clothesline and give them a call today!

My washer won’t stop shaking! What can I do?

Is it Time For a Washer Repair?

As you go about your day-to-day household chores, we all know it’s just a matter of time before a wrench is thrown in your well-intended plans. Sometimes it’s unavoidable. And while there are big and small “wrenches,” maybe you’ve experienced this one – a shaking washing machine. Furious shaking coming from the laundry room is anything but pleasant.

If your washer is shaking all the time, it’s not something you need to live with! There are a few reasons this may be happening. Some of them you can easily fix on your own, so keep reading! But after that, it’s best that you call a trusted repair man and get schedule a washer repair appointment right away.

Level your machine

One reason your washing machine may be shaking is because the machine isn’t level on the floor. If this is the case, it’s something you can easily fix yourself! First, tip your machine to figure out which side needs to be propped up. Adjust the leveling screw on the base as needed, so your washing machine has good contact with the floor. And if your leveling screws are old or damaged so that you are unable to level your machine, try using a shim (which can be made out of many materials) to level your machine by sliding it under a corner until the machine is level.

 Balance the load

Another culprit for a shaking washing machine could be an unbalanced load of laundry in your machine. Having all of your dirty clothes pile up on one side of the drum can make your machine lopsided, and this quickly leads to a shaking. If you find there are more clothes on one side of the drum than another, simply move the clothes around until it looks more even and restart the cycle.

 Repairs

If your machine is still shaking after trouble shooting for off-balance clothing and feet, you may Washer Repairbe in need of a washer repair. Vibrating and shaking mean there are a few different parts that could need attention; you could have a problem with a suspension spring, tub spring, snubber ring or damper pad to name a few!
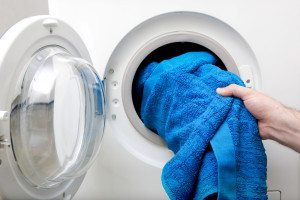
For example, if the shock absorbers (used to absorb movement during the spin cycle) are weak or damaged, unbalanced loads will shake and move the machine while making loud banging sounds. Leaving this piece for long can mean wreaking havoc on other parts of your machine.

Or if you have a top-loading washer, the smoothness of your spin cycle may rely on tub dampening straps that help to control and cushion movement. There are four straps that are made of rubber and they attach from the top of the tub to each corner of the cabinet. Overtime, when a strap is damaged, stretched out or broken, the machine will shake as the tub inside makes contact with the cabinet during the spin cycle.

These are just two examples of how parts wear out over time and require a washer repair. If you’ve tried to level your washing machine on the ground, and tried to balance your wet clothes to no avail, call Complete Appliance Repair. This locally owned and family operated repair shop in Salt Lake City will have your washer up and running, jiggle-free, in no time!

Show Your Refrigerator Some Love This Valentine’s Day

With Valentine’s Day right around the corner, you may be busy thinking about what special meal you will prepare for your sweetheart, or when to pick up those dozen roses. Don’t worry, you’ve still got time!Refrigerator Maintenance Salt Lake City Utah

But there is someone else who could use a little love – your refrigerator. Your fridge keeps your milk perfectly chilled and your vegetables frozen for you all year long. This is probably the last appliance you want to break. By taking a few minutes a few times a year to do these simple tasks, you can improve the lifetime of your refrigerator and avoid unnecessary repairs.

Refrigerator Maintenance Step 1:

Take a look at the inside of your fridge. You should be regularly wiping down the inside, but every once in a while give the bins, selves, shelf end caps, and retainer bars a closer look. Also check any glass shelves, crisper drawers and drawer slides. Look for anything broken, cracked, unstable or defective. As soon as you notice any of these problems, you’ll want to replace of fix it to prevent any further damage that may be caused by a falling shelf of food.

Refrigerator Maintenance Step 2:

Next, take a look at the seal, or gasket on the refrigerator. It is the vinyl strip that forms a seal between the cabinet and the doors. It keeps the fridge running efficiently by keeping room-temperature air out, and chilled air in.

You can perform a simple test to check the seal by shutting a dollar bill between the seal and the door. Once the door is shut, pull the dollar bill out of the fridge door. If there is tension when you pull, you’ve got a good seal. Try this test in several different spots along the seal. If this little test proves your seal is lackluster, it may not be flexible enough. Try massaging a vinyl conditioner or a thin film of petroleum jelly to loosen up the seal.

Bonus Step

Also, be sure to wipe up any spills before they stick and cause the seal to tear. This will also maintain flexibility and prevent odors. If you notice the gasket is loose or torn, it’s time to replace it. This can be tricky to do, so be sure to call Complete Appliance Repair to do the job right.

Refrigerator Maintenance Step 3:

The inside of your fridge isn’t the only place that needs to be maintained. For starters, the hinges get plenty of action every day. Which is why it’s important to make sure the hinges are in good shape and have proper lubrication. Wear and tear is normal, but occasionally using some food-grade lubrication on the hinges and checking for any damage on the top and bottom hinges will prolong the overall life of your fridge.

Refrigerator Maintenance Step 4:

You can also help your fridge stay efficient by removing any dirt, dust, and hair that often collects on the condenser coils and condenser fan. Cleaning the condenser coils and fan can also maintain proper airflow.

To clean these parts, you should first make sure that your refrigerator has been unplugged. The condenser coils are usually located at the back or the fridge or across the bottom. If the coils are at the bottom of the fridge, it’s likely the fan will be there too. To clean, remove the back panel of the refrigerator. Then with a vacuum and soft brush, remove any buildup. Do this carefully and avoid damaging the coils or fan.

Conclusion:

Occasionally taking the time to maintain your refrigerator will help you avoid any unnecessary repairs, and it will also help you catch those repairs that are important to address without delay. If you have any questions about your refrigerator or other appliances, be sure to call Complete Appliance Repair.


Why Won’t My Front-Loading Washer Drain?

You hear the cycle on your front loading washer stop, so you head to the laundry room to put the clothes in the dryer, but you are greeted by the sight of water still in the tub. Why hasn’tFront Loading Washer the water drained out?

Read on to learn about some possible causes and solutions. In some cases, you may even be able to handle the problem yourself and avoid a service call.

Check the Drain Hose

Start by taking a look at the machine’s drain hose.

If the hose is kinked, twisted or bent, your washing machine may not be able to drain properly. The hose also can become partially or fully blocked by a piece of laundry or other obstruction.

Try removing the hose to check for blockages (disconnect it over a bucket to avoid a mess!), and straighten any kinks or bends. When you replace the hose, make sure it is not more than 8 feet from the floor, as this can hamper drainage.

Clear the Drain Trap

Front-loading washers have drain traps that collect any small items that end up in your laundry (Legos or little green Army men, for example). The trap prevents coins, hardware and other small items from entering the main drain.

This trap is typically on the front of the washing machine, so look for a small cutout at the bottom. Gently pry the cutout off, either by hand or with a screwdriver, if necessary. Next, remove the screw cap, using a container to collect any water that may leak out.

Finally, slide out the drain trap and remove any items, then replace it securely.

Other Potential Causes

If your front loader has gone dead in the middle of a cycle and is completely full of water, it’s definitely worthwhile to check for a tripped circuit breaker or GFI, blown fuse, or — simplest of all — see if the washer wasn’t accidentally unplugged.

If none of these options solves the issue, you may indeed have a mechanical problem.

If the water won’t drain, it could be a problem with the washing machine’s pump, or it could be an electrical fault inside the appliance that has stopped the pump from doing its job. You may even have a defect in the lid switch assembly, which can lead the machine to believe its door is open.

With any of these problems, a DIY appliance repair probably isn’t possible, which means it’s time to call an experienced technician from Complete Appliance Repair. Serving North Salt Lake and the greater northern Utah area, we specialize in quick, professional repairs to have you back up and washing in no time. Call us today if your front-loading washer is giving you any problems.

Why Your Washer Won’t Agitate or Spin

If your washer won’t agitate or spin after filling with water and beginning the cycle, your clothes will never come clean. Only a qualified repair technician can help you diagnose your Washer Won't Agitatewasher problems for sure, but in the meantime, here are a few possible causes.

Agitator Issues

In some cases when the washer fails to agitate, the agitator itself may be the problem. Driven by the output shaft of the transmission, this part has a spline that can break or strip away, which can cause the agitator to fail as it becomes disconnected from the drive system.

Depending upon the brand and model of your washing machine, you may have either a single-piece unit or a two-piece, dual-action agitator. If yours is a dual-action model, the upper portion can become disengaged from the lower portion, in which case the directional cogs will need to be replaced.

Defective Lid Switch Assembly or Door Lock

The lid of your washing machine comes equipped with a switch or latch that ensures that the lid is closed before operation (unless you have a vintage model, most of which did not include this safety feature). This door assembly is connected to the motor circuit, and when the lid is shut, the motor will operate. If that connection is not made, the motor won’t run.

If your washer won’t agitate and the motor doesn’t seem to be getting power, you may have a defective door latch. You can inspect the lid assembly for visual damage; however, this mechanism can also fail electrically, so the door switches may need to be tested with a multimeter tool.

Other Causes of Washer Agitation Malfunction

If your washer won’t agitate or spin, you may have an issue with the drive belt, which drives the transmission, or with the drive block, which connects the transmission to the agitator. You can remove the front panel or cabinet of your washing machine to check if the belt, typically located at the bottom of the machine, is worn, loose or broken. Also take a look at the drive block to see if it is stripped or damaged. In rare cases, the drive motor, which drives the transmission, may be at fault.

Damage to other parts of your washing machine, such as the motor coupling, rotor or stator assembly, wash plate or motor control board could also be the cause of your problem. As you may already have concluded, you could be facing a complex repair that requires an experienced technician. Unless you’re familiar with your appliance’s operation, even opening the cover can cause injury. At best, it probably violates any warranty you have.

Don’t take chances. At the first sign of a problem, call the home appliance experts at Complete Appliance Repair. Serving the communities of northern Utah, our professional technicians know exactly how to diagnose and repair whatever is wrong when your washer won’t agitate.